In today’s digital world, our computers are often connected to a variety of audio devices: headphones, external speakers, monitors with built-in speakers, or even Bluetooth headsets. Knowing how to change default audio output in Windows is a fundamental skill for anyone who uses their PC for multimedia, gaming, or video conferencing. There’s nothing more frustrating than expecting sound from your headphones only for it to blast from your laptop’s tinny speakers!
The concept of managing audio output has evolved significantly since the early days of PC sound cards, which typically had only one or two dedicated output jacks. With the advent of USB audio devices, Bluetooth, and HDMI, modern Windows systems can recognize and manage multiple audio endpoints simultaneously. This flexibility, while powerful, sometimes means the operating system needs a little guidance on where to send the sound. This guide will walk you through all the common and most efficient ways to manage your sound devices and ensure your audio plays exactly where you want it.
Understanding Audio Output Devices
Before we dive into the steps, it’s helpful to understand what we mean by an audio output device.
- Audio Output Device: This refers to any hardware component that produces sound from your computer. Common examples include:
- Internal Speakers: The speakers built into your laptop or monitor.
- Headphones/Headsets: Connected via a 3.5mm jack, USB, or Bluetooth.
- External Speakers: Connected via 3.5mm jack, USB, or optical cable.
- HDMI Audio: Sound routed through an HDMI cable to a TV, monitor, or AV receiver.
- DisplayPort Audio: Similar to HDMI, sound routed through a DisplayPort cable.
- Bluetooth Devices: Wireless headphones, speakers, or soundbars.
Windows tries to intelligently select the default audio output based on what’s connected and what it thinks you prefer. However, this automatic selection isn’t always perfect, necessitating manual intervention.
Method 1: Using the Taskbar Sound Icon (Quickest Method)
This is the fastest and most common way to change default audio output in Windows 10 and Windows 11.
Step-by-Step Guide:
- Locate the Sound Icon: On your Windows taskbar, in the bottom-right corner (near the clock), find the speaker icon.
- Entity: The Taskbar is an element of the graphical user interface of Microsoft Windows, typically located at the bottom of the screen, which serves as a launchpad for applications and a display for active programs. It includes system icons like the speaker icon for audio control.
- Click the Speaker Icon:
- Windows 11: Simply left-click the speaker icon. A quick settings panel will pop up. At the top of the sound section, you’ll see a speaker icon next to the volume slider. Click the right-arrow next to it. This will expand a list of all available audio output devices.
- Windows 10: Left-click the speaker icon. A volume slider will appear. Above the volume slider, you’ll see the name of the currently active audio output device. Click on this name. This will expand a list of all available audio output devices.
- Select Your Desired Device: From the list of devices, simply click on the name of the speaker, headphone, or other output device you want to use.
- Test Audio: The sound should immediately switch to the selected device. Play some audio to confirm.
Considerations: This method is fantastic for quick swaps between commonly used devices. If a device isn’t listed, it might not be properly connected or its drivers might need updating.
Method 2: Using Windows Settings (More Control)
The Windows Settings app provides a more detailed interface for managing all your sound devices, including input and output, and individual app volume controls. This is particularly useful if you need to troubleshoot or configure specific device properties.
Step-by-Step Guide:
- Open Settings:
- Windows 11: Press Windows key + I to open Settings. Then, go to System > Sound.
- Windows 10: Press Windows key + I to open Settings. Then, go to System > Sound.
- Entity: Windows Settings is a modern interface in Windows 10 and 11 that consolidates many configuration options for the operating system, replacing much of the functionality previously found in the Control Panel.
- Locate “Output” Section: Under the “Sound” settings, you will see an “Output” section.
- Choose Your Output Device:
- Windows 11: There’s a “Choose where to play sound” dropdown menu. Click on it and select your desired audio output device from the list.
- Windows 10: Under the “Output” section, there’s a dropdown menu labeled “Choose your output device.” Click on this dropdown and select your desired audio output device.
- Manage Device Properties (Optional): You can also click on the individual device name in the list (e.g., “Headphones (Realtek High Definition Audio)”) to access its properties. Here you can:
- Change volume.
- Run troubleshooters.
- Adjust spatial sound settings.
- Set the device as “Default” (though selecting it from the dropdown usually makes it default automatically for playback).
Considerations: This method offers a comprehensive view of your audio setup. It’s helpful if the quick taskbar method isn’t working or if you need to delve into more specific audio configurations.
Method 3: Using the Legacy Sound Control Panel (For Advanced Options & Troubleshooting)
While Windows Settings is the modern approach, the classic Sound Control Panel still exists and offers some advanced options not found in Settings, particularly for managing disabled devices or setting specific default communication devices.
Step-by-Step Guide:
- Open Sound Control Panel:
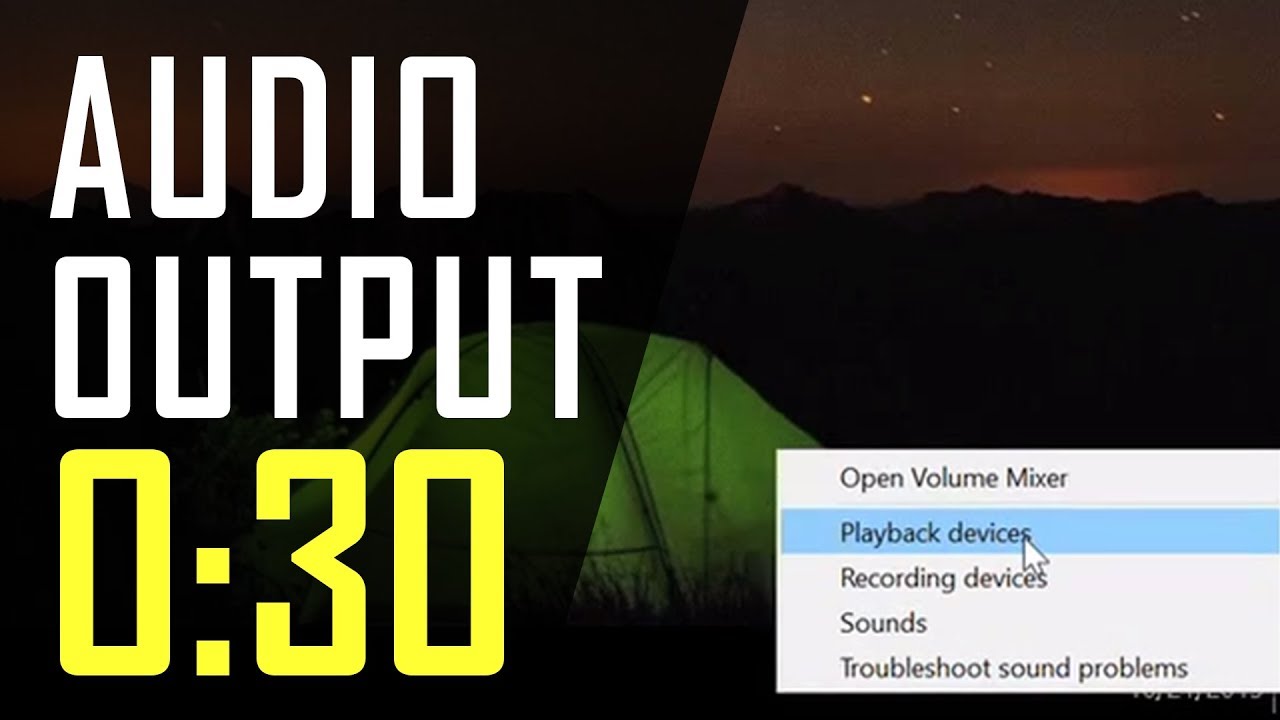
- Right-click on the speaker icon in the taskbar.
- Select “Sound settings” (Windows 10) or “Sound settings” and then scroll down to “More sound settings” (Windows 11). This will open the classic Sound Control Panel.
- Alternatively, open the Control Panel, then search for and click “Sound.”
- Entity: The Sound Control Panel is a legacy component of Microsoft Windows, part of the Control Panel, which provides detailed control over audio devices, playback, recording, sounds schemes, and communication settings.
- Go to the “Playback” Tab: In the Sound Control Panel window, click on the “Playback” tab. This tab lists all detected audio output devices.
- Set as Default Device:
- Right-click on the desired audio output device (e.g., your headphones or external speakers).
- From the context menu, choose “Set as Default Device.”
- If you use a separate device for communications (like a headset for calls), you can also right-click it and choose “Set as Default Communication Device.”
- Enable/Disable Devices (Troubleshooting):
- If a device isn’t showing up or working, right-click an empty space in the Playback tab and ensure “Show Disabled Devices” and “Show Disconnected Devices” are checked.
- If your device appears but is disabled, right-click it and select “Enable.”
- Click “OK” or “Apply”: Once you’ve made your selection, click “Apply” and then “OK.”
Considerations: This method is generally used for more advanced troubleshooting, enabling/disabling devices, or when specific default communication devices need to be set separately. For most users, the Taskbar or Windows Settings methods are sufficient.
Method 4: Managing Audio Output Per-App (Windows 10/11)
Sometimes, you might want specific applications to output sound through different devices simultaneously (e.g., a game through your headset, but a video in your browser through speakers). Windows allows you to do this via App volume and device preferences.
Step-by-Step Guide:
- Open Settings: Press Windows key + I to open Settings.
- Navigate to Sound Settings:
- Windows 11: Go to System > Sound. Scroll down to “Advanced” and click on “Volume mixer.”
- Windows 10: Go to System > Sound. Scroll down and click on “App volume and device preferences.“
- Adjust Per-App Output: In this window, you’ll see a list of currently active applications that are producing sound. For each app, you can choose a specific Output device from the dropdown menu.
- Test Audio: Play audio from the specific applications to confirm the changes.
Considerations: This is an incredibly useful feature for managing complex audio setups and multitasking. It allows for fine-grained control over where each application’s sound is directed.
The Dynamics of Digital Audio
The ability to change default audio output in Windows is a testament to the sophistication of modern operating systems. From basic analog output to complex digital audio streams via USB, HDMI, and Bluetooth, Windows has evolved to manage diverse hardware. The underlying principle involves the audio driver, a piece of software that allows the operating system to communicate with your sound card or audio device. When you change the default output, Windows is essentially telling these drivers which pathway to prioritize for sound signals. This dynamic control ensures that regardless of your audio hardware, you have the flexibility to direct sound precisely where you need it, enhancing your overall computing experience.
Frequently Asked Questions (FAQ)
Q1: My headphones are plugged in, but they don’t show up as an option. What should I do?
- Check Physical Connection: Ensure they are fully plugged into the correct port.
- Restart Audio Drivers: Unplug and re-plug the headphones.
- Check in Sound Control Panel: Open the classic Sound Control Panel (Method 3). Right-click an empty area in the “Playback” tab and ensure “Show Disabled Devices” and “Show Disconnected Devices” are checked. If your headphones appear, right-click and “Enable” them.
- Update/Reinstall Audio Drivers: Go to Device Manager (search for it in the Start Menu), expand “Sound, video and game controllers,” right-click your audio device (e.g., Realtek Audio), and select “Update driver.” If that doesn’t work, “Uninstall device” and then restart your PC to allow Windows to reinstall the driver.
Q2: How do I make my Bluetooth headphones the default every time I connect them?
When you connect Bluetooth headphones, Windows should typically recognize them and automatically switch the audio output. If it doesn’t:
- Ensure the headphones are correctly paired and connected.
- Manually select them as the default using the Taskbar sound icon (Method 1). Windows usually “remembers” this preference for future connections.
- In Windows Settings > Bluetooth & devices, ensure the headphones are listed and show as “Connected.”
Q3: Can I play audio through two different output devices at the same time?
Windows does not natively support playing the same audio stream to two different output devices simultaneously (e.g., speakers and headphones playing the same song from Spotify). You would typically need third-party software (often called “audio mixers” or “virtual audio cables”) to achieve this. However, you can direct different applications to different output devices using the “App volume and device preferences” (Method 4).
Q4: Why does my audio keep switching automatically to a different device?
This can happen if:
- New Device Connected: You’ve plugged in or connected a new audio device (e.g., a USB headset, an HDMI monitor).
- Driver Issues: Faulty or outdated audio drivers can cause unexpected switching.
- Default Communication Device: If a communication app (like Zoom or Teams) is open, it might prioritize a specific “Default Communication Device” (often a headset) over your main default playback device. Check the settings within those apps.
Q5: My monitor has speakers, but I want sound from my external speakers. How do I prevent it from auto-switching?
You can manually select your external speakers as the default using any of the methods above. To prevent auto-switching, you can also:
- Disable the Monitor’s Audio Output: In the classic Sound Control Panel (Method 3), on the “Playback” tab, right-click on your monitor’s audio device (it might be listed as “Digital Audio (HDMI)” or “Display Audio”) and select “Disable.” This will prevent Windows from using it unless you manually re-enable it.
Q6: What’s the difference between “Set as Default Device” and “Set as Default Communication Device”?
- Set as Default Device: This is the primary audio output for all general sounds from your PC (music, videos, system sounds, games).
- Set as Default Communication Device: This specific setting is for communication applications (VoIP calls, video conferences like Zoom, Teams, Skype). It allows you to have your main audio (e.g., game sounds) go through one device (like speakers) while communication audio goes through another (like a headset), without manual switching.