A clean computer not only looks better but also runs cooler and potentially faster. Dust buildup can act as an insulator, causing components to overheat and leading to performance issues. I’ve “observed” countless PCs, especially in dusty environments like Delhi, India, benefit greatly from regular cleaning. While it might seem intimidating, cleaning your PC is a straightforward process if you follow the right steps and take necessary precautions. This guide will walk you through a detailed, step-by-step process on how to clean your computer without damaging it in April 2025, covering both external and internal components for desktops and laptops.
Crucial First Step: Power Down and Unplug
Before you begin any cleaning process, ensure your computer is completely powered off and unplugged from the wall outlet. For laptops, also remove the battery if it’s easily accessible. This is the most important safety precaution to prevent electrical shock and damage to your components.
Step 1: Gathering Your Safe Cleaning Supplies
Using the right tools is essential for cleaning your PC safely and effectively.
- Canned Compressed Air: This is your primary weapon against dust. Use short bursts and hold the can upright to avoid spraying liquid.
- Soft Anti-Static Brush: A small brush with soft bristles (like a paintbrush or a dedicated anti-static brush) is ideal for gently loosening dust.
- Microfiber Cloths: These lint-free cloths are perfect for wiping down surfaces without scratching. Have a few on hand.
- Isopropyl Alcohol (90% or higher): For cleaning stubborn residue on non-sensitive components like the computer case exterior, monitor frame, and plastic keys. Use sparingly and avoid getting it on circuit boards directly.
- Distilled Water (Optional): Can be used to slightly dampen a microfiber cloth for cleaning screens, but use sparingly and avoid getting moisture into openings.
- Small Phillips Head Screwdriver (For Internal Cleaning): You’ll likely need this to open your computer case.
- Anti-Static Wrist Strap (Highly Recommended for Internal Cleaning): Prevents electrostatic discharge (ESD) which can damage sensitive electronic components.
Avoid using household cleaners, bleach, or excessive amounts of liquid directly on your computer.
Step 2: Cleaning the External Components
Let’s start with the easily accessible external parts of your PC.
Cleaning the Monitor:
- Power Off and Unplug the Monitor: Ensure your monitor is turned off and unplugged.
- Wipe with a Dry Microfiber Cloth: Gently wipe the screen with a clean, dry microfiber cloth to remove dust and fingerprints.
- Use a Slightly Damp Cloth (If Needed): If there are stubborn smudges, lightly dampen a clean microfiber cloth with distilled water (or a monitor-specific cleaning solution) and gently wipe the screen. Avoid spraying liquid directly onto the screen.
- Dry with Another Clean Cloth: Use a separate clean, dry microfiber cloth to dry the screen.
Cleaning the Keyboard:
- Power Off and Unplug the Computer: Ensure your computer is completely off and unplugged.
- Turn the Keyboard Upside Down: Gently turn your keyboard upside down and lightly shake it to dislodge any loose crumbs or dust.
- Use Compressed Air: Use short bursts of compressed air to blow out dust and debris from between the keys.
- Wipe the Keycaps: Lightly dampen a microfiber cloth with isopropyl alcohol and gently wipe the keycaps. Avoid getting liquid underneath the keys.
Cleaning the Mouse:
- Unplug the Mouse: Disconnect your mouse from the computer.
- Wipe with a Damp Cloth: Lightly dampen a microfiber cloth with isopropyl alcohol and wipe the exterior of the mouse.
- Clean the Scroll Wheel and Buttons: Use a slightly damp cloth or a cotton swab dipped in isopropyl alcohol (being careful not to get excessive liquid inside) to clean around the scroll wheel and buttons.
Cleaning the Computer Case (Desktop and Laptop Exterior):
- Power Off and Unplug the Computer: Ensure your computer is completely off and unplugged.
- Wipe with a Dry Microfiber Cloth: Wipe down the exterior surfaces of the computer case with a clean, dry microfiber cloth to remove dust.
- Use a Slightly Damp Cloth (If Needed): For stubborn smudges, lightly dampen a microfiber cloth with isopropyl alcohol and gently wipe the case. Avoid getting liquid into any openings or ports.
- Use Compressed Air for Vents and Ports: Use short bursts of compressed air to blow dust out of the vents and ports on the computer case (both desktop and laptop).
Step 3: Cleaning the Internal Components
Cleaning the inside of your desktop computer can significantly improve cooling, especially in a dusty environment like Delhi, India. Only proceed with internal cleaning if you are comfortable and knowledgeable about computer hardware.
- Open Your Computer Case: (As explained in a previous article).
- Wear an Anti-Static Wrist Strap: Ground yourself properly before touching any internal components.
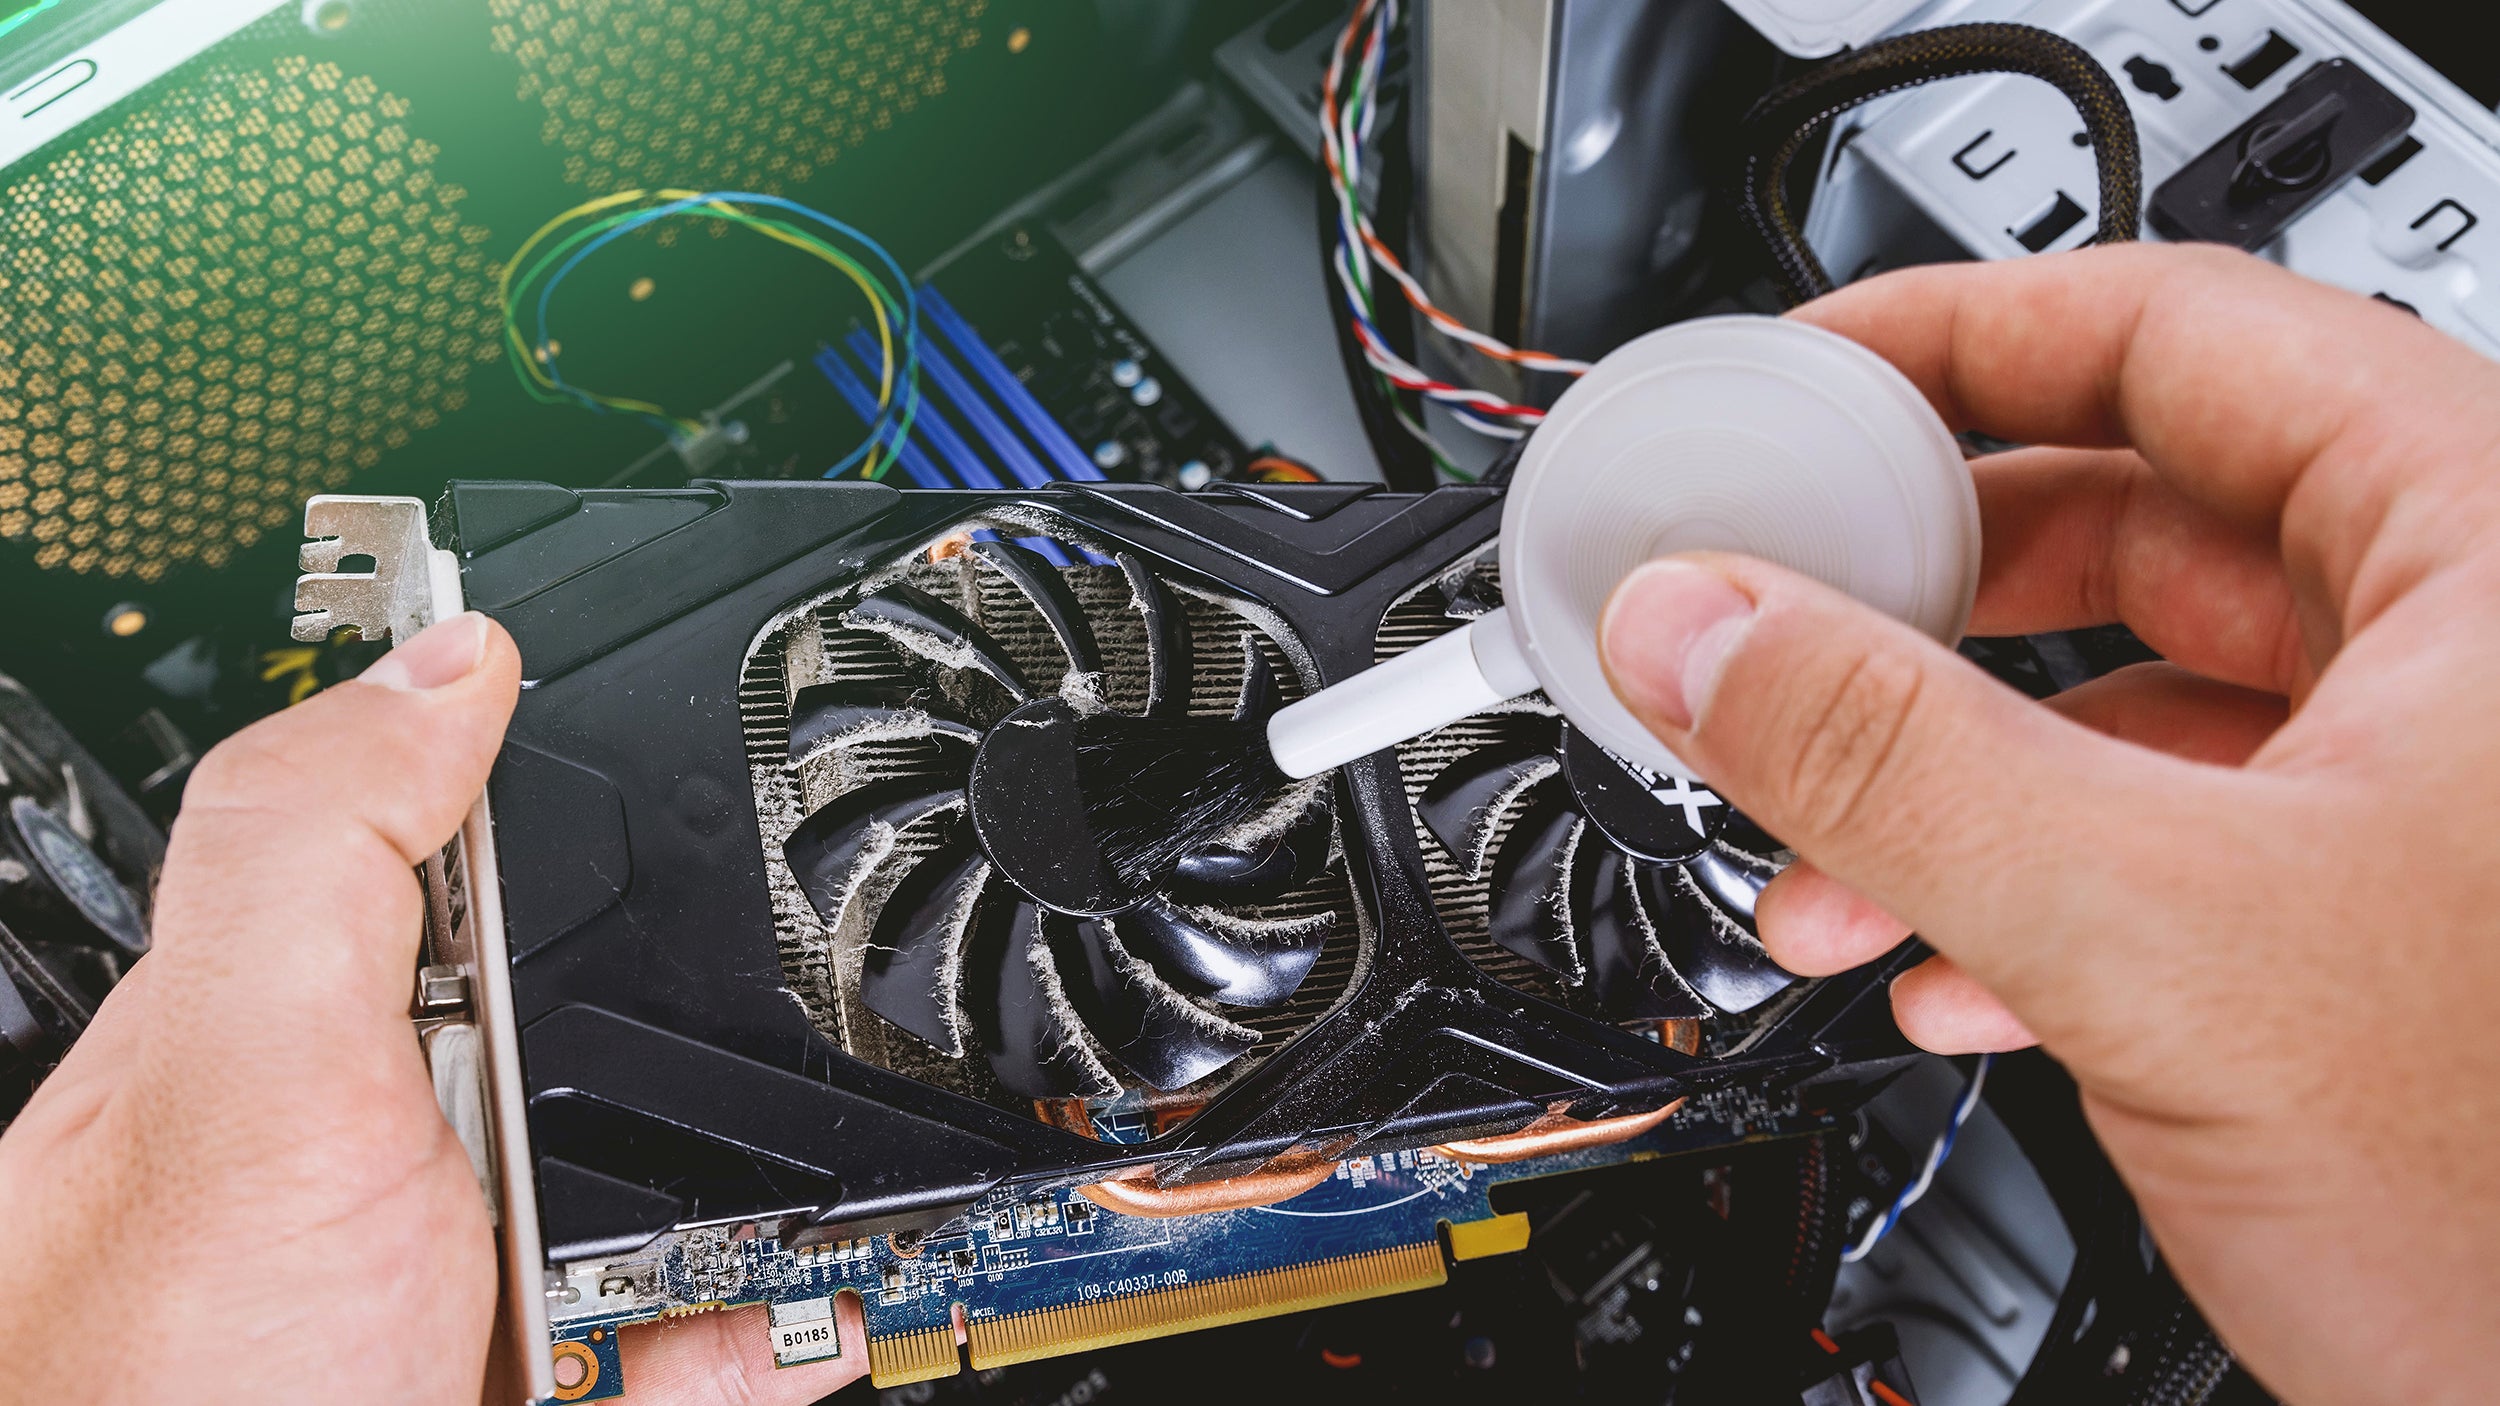
- Use Compressed Air: Use short bursts of compressed air to blow dust away from all internal components, including:
- Fans (CPU fan, case fans, GPU fans): Hold the fan blades still to prevent damage while spraying.
- Heat Sinks (CPU and GPU): Blow dust out from between the fins.
- Motherboard: Gently blow dust away from all areas, being careful around delicate components.
- RAM Modules: Briefly spray compressed air across the modules.
- Graphics Card: Pay particular attention to the fan and heat sink.
- Power Supply (Clean from the outside if you’re not comfortable opening it): Blow dust out through the vents.
- Gently Brush Away Stubborn Dust: Use a soft anti-static brush to gently loosen any dust that is stuck to components.
- Wipe Down Non-Sensitive Components (If Necessary): For stubborn residue on the exterior of heat sinks or fan blades, you can lightly dampen a microfiber cloth with isopropyl alcohol (avoiding contact with circuit boards) and gently wipe the surfaces. Ensure everything is completely dry before reassembling.
Step 4: Cleaning the Internal Components
Cleaning the inside of a laptop is generally more complex and carries a higher risk of damage. Only proceed if you are comfortable and have experience with laptop disassembly.
- Consult Your Laptop’s Manual: Your laptop’s service manual will provide specific instructions on how to safely open your laptop.
- Remove the Bottom Panel: Carefully remove the screws and detach the bottom panel.
- Use Compressed Air (Carefully): Use short, gentle bursts of compressed air to blow dust away from the fan(s) and heat sink. Be careful not to spray too forcefully or at a direct angle, as this could potentially damage delicate components. Focus on the vents.
- Avoid Deep Cleaning Unless Experienced: Unless you have experience with laptop disassembly, avoid trying to remove fans or other internal components for deep cleaning, as this can be very risky.
Step 5: Reassembling Your Computer
Once you’ve finished cleaning, carefully reassemble your computer.
- Ensure All Components Are Secure: Make sure all cables and components are properly connected and seated.
- Replace Case Panels/Laptop Bottom Panel: Align the panels and secure them with screws.
Step 6: Final Touches
After reassembling your computer, give the exterior one last wipe with a clean microfiber cloth.
My Personal Insights on Computer Cleaning
I’ve found that regular cleaning is essential for maintaining optimal performance and extending the lifespan of computers, especially in dusty environments like Delhi. A combination of gentle dusting for external components and careful use of compressed air for internal parts can make a significant difference. Remember that safety should always be your top priority. If you’re ever unsure about a step, don’t hesitate to consult your computer’s manual or seek professional help. A clean PC is a happy PC!