Narrator is a built-in screen reader developed by Microsoft for Windows users. Designed primarily for visually impaired individuals, it reads aloud on-screen text and describes events like notifications and calendar appointments. Whether you’re setting it up for the first time or looking to fine-tune its features, this guide will walk you through how to use Narrator for screen reading in Windows.
Step 1: Turn On Narrator
There are several ways to activate N
arrator:
- Via Keyboard Shortcut:
- Press Ctrl + Windows + Enter.
- From Settings:
- Go to Start > Settings > Accessibility > Narrator.
- Toggle the Narrator switch to On.
- From the Sign-in Screen:
- Select the Ease of Access icon in the lower-right corner.
- Choose Narrator to enable it before logging in.
Step 2: Configure Basic Settings
After launching Narrator, it’s essential to tailor the experience to your needs.
- Change Voice Settings:
- Go to Settings > Accessibility > Narrator > Personalize Narrator’s voice.
- Choose a voice, adjust speed, pitch, and volume.
- Set Start-up Preferences:
- Decide if you want Narrator to start automatically every time you sign in.
- Choose a Verbosity Level:
- Set how much detail Narrator reads. Choose between text only, text and controls, or detailed information.
Step 3: Learn Key Narrator Commands
Narrator uses the Caps Lock key (called the Narrator key) with other keys to navigate and control reading. Some essential shortcuts:
- Caps Lock + M: Start reading from the current location.
- Caps Lock + H: Read document headings.
- Caps Lock + F: Read current item in detail.
- Caps Lock + Space: Activate the selected item.
- Caps Lock + Q: Exit Narrator.
You can change the Narrator key in settings if needed.
Step 4: Use the Narrator Quick Start Guide
Microsoft includes an interactive tutorial for beginners:
- After enabling Narrator, it will launch the QuickStart Guide.
- Follow prompts to learn core commands and navigation principles.
You can relaunch this guide anytime from Settings > Accessibility > Narrator > Launch QuickStart.
Step 5: Navigate with Scan Mode
Scan Mode lets you use arrow keys to browse:
- Toggle Scan Mode: Press Caps Lock + Space.
- Navigate: Use Up/Down arrows for paragraphs and Left/Right for characters or words.
- Press Enter to activate a link or button.
Scan Mode is ideal for browsing the web or reading documents.
Step 6: Customize Reading Preferences
- Reading Behavior:
- Go to Narrator settings > Verbosity.
- Customize how punctuation, formatting, and page structure are read.
- Braille Support:
- Windows supports braille displays. Go to Narrator > Braille.
- Download additional components and connect your display.
Step 7: Troubleshoot Common Issues
- Narrator Not Starting? Ensure keyboard shortcuts are enabled and check that Accessibility settings are correctly configured.
- Performance Lag? Reduce voice verbosity or switch to a simpler voice.
- Overly Verbose Output? Adjust verbosity and punctuation levels under settings.
Step 8: Advanced Tips and Best Practices
- Use Narrator with Edge: It integrates well with Microsoft Edge for browsing.
- Practice Commands Regularly: Helps with memorization and speed.
- Join Communities: The r/blind subreddit and Quora discussions offer practical tips from real users.
- Try Narrator + Headphones: Improves focus and reduces distractions in shared environments.
Conclusion
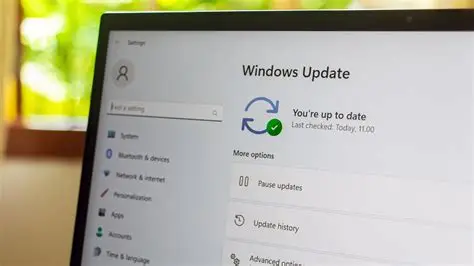
Learning how to use Narrator for screen reading in Windows opens up greater accessibility and independence. With practice and personalization, Narrator becomes a powerful tool for navigating both the desktop and the web. Always keep your Windows updated to access the latest Narrator features and improvements.