nobanusa.com
nobanusa.com
nobanusa.com
What are You Looking for?
Search
Business
Crypto
Editorial
Health
Tech
Home
Editorial
Page 2
Editorial
29 posts
By
Lucas
June 11, 2025
How to Clone your Windows OS to a New SSD
Editorial
By
Lucas
June 7, 2025
How to Block Software Installation Using Group Policy in Windows
Editorial
By
James
June 4, 2025
How to Create Keyboard Shortcuts in Windows
Editorial
By
James
June 3, 2025
How to Set a Static IP Address in Windows
Editorial
By
Lucas
May 30, 2025
How to Recover Deleted Files from Recycle Bin in Windows
Editorial
By
Lucas
May 23, 2025
How to Use Narrator for Screen Reading in Windows
Editorial
By
Lucas
May 21, 2025
How to Fix Mouse Lag in Windows 11
Editorial
By
Lucas
May 20, 2025
How to Find iPhone Serial Number if Phone is Locked
Editorial
By
Lucas
May 7, 2025
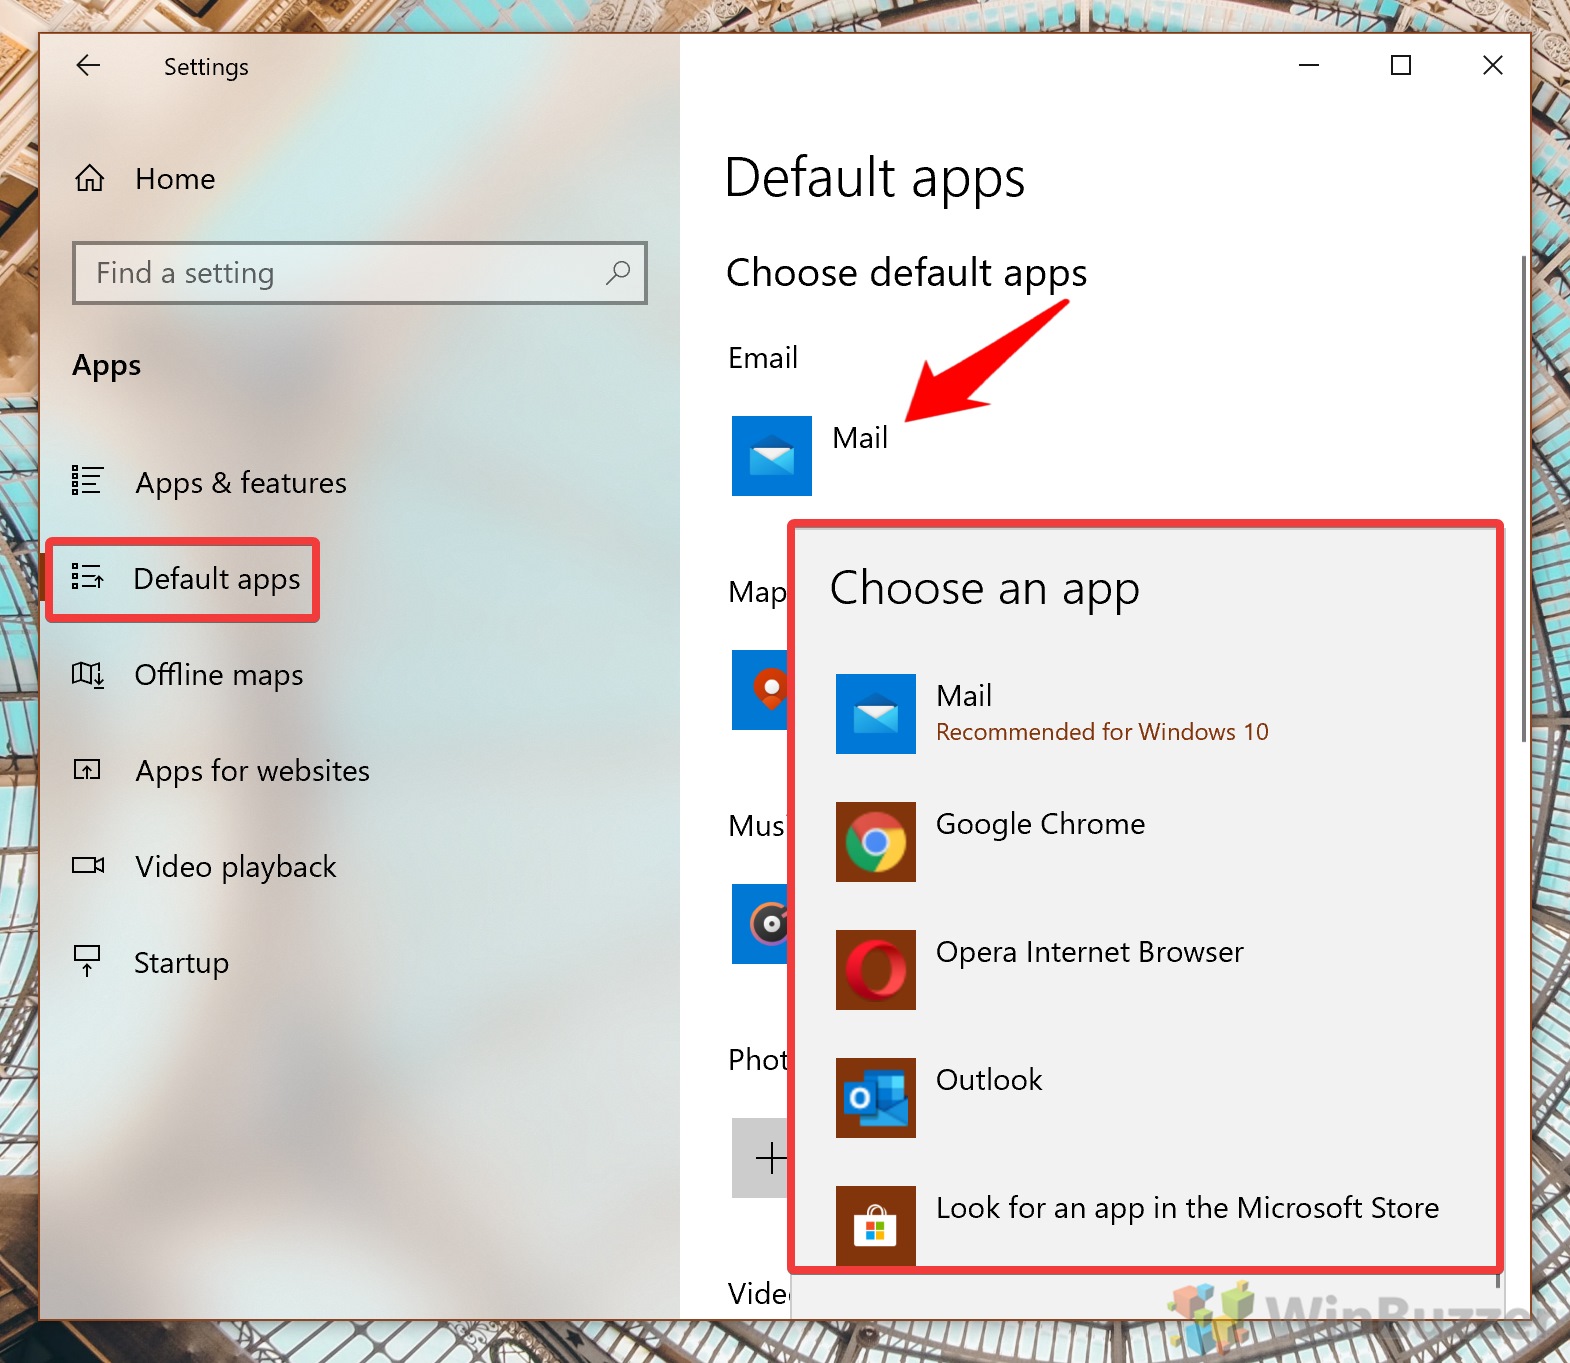
How to Change Default Apps in Windows
Editorial
By
Elijah
May 6, 2025
How to Enhance Productivity with AI tools on Windows 10
Editorial